
Colour Splash (by Paul Topham).
In this workshop, Paul explains a technique for converting a colour image into a mono image, leaving a colour splash.
Please note: It would be beneficial to read the complete workshop before you attempt to follow the procedure. If you would like a print out to read, please follow the links at the end of this workshop.
Before Colour
After Mono

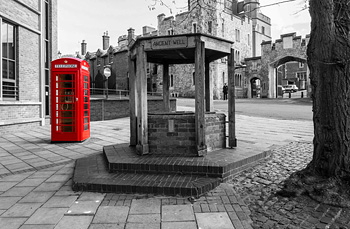
Open image
Using menus along the top of Photoshop click on ‘Select’.
From drop down menu click on ‘Colour Range’ – New window appears.
Use ‘Sampled Colours’. Also click on ‘Selection Preview’ at the bottom of this window and from the drop down click on ‘Black Matte’. (This will help when isolating the telephone box.
Your curser will turn into an eye-dropper. Start by clicking somewhere on the telephone box and while holding down the ‘Shift Key’ click on other areas.
Also tick ‘Localise Colour Cluster. Adjust the ‘Fuzziness and Range sliders accordingly to get the best image of just the phone box.
Now click on ‘Invert’.
Click OK.
You should now have a colour image with ‘marching ants’ around the phone box.
We now need to turn the rest of the image into Black and White.
At the bottom of the layers pallet there is a circle icon (half white, half black) Click on this and from the menu click on ‘Black & White.
This will now give you a new adjustment layer, with a layer mask and turn the image into monochrome.
Using a small brush and black selected as your colour paint over any area of the phone box that was missed during selection. Switch to white and paint over the ‘No Entry’ sign to change this to Black and White. Any areas where you make a mistake can be corrected using smaller brushes and painting with either Black or White until you end up with a black and white image with a red telephone box.
To download a printable version of this workshop, click on the links below