
Create a drop shadow within your borders.
In this workshop, we will take, adding borders onto a further stage, by creating a drop shadow, to give the border some depth.
Please note: It would be beneficial to read the complete workshop before you attempt to follow the procedure. If you would like a print out to read, please follow the links at the end of this workshop.
Before attempting this workshop, please read and follow my other workshop on, “Single coloured border around your image”. This will help you to find, and understand the tools and palettes we are going to use in this workshop.
Note: The image I am working on in this workshop is 280mm wide by 180mm high. You may need to adjust the values to create the same effect, depending on the size of your image.
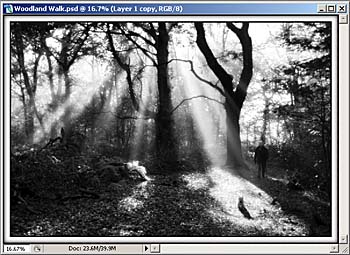
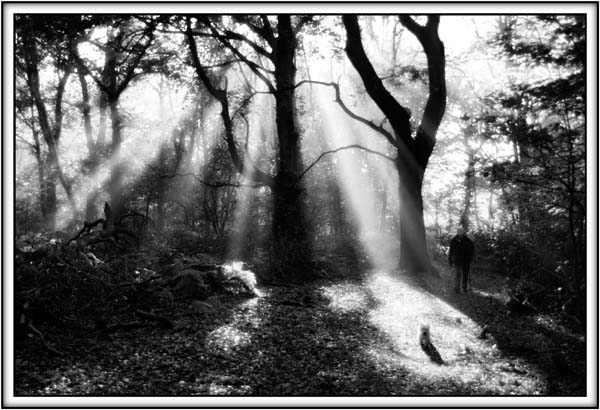
This is my start image. “Woodland Walk”
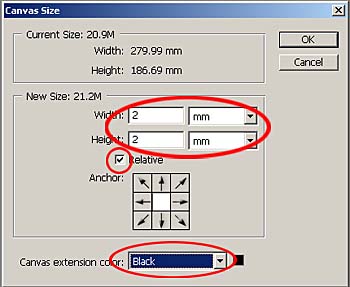
Step 1: Create the first border around the image by going to Image>Canvas Size. In the canvas size palette make sure the relative box is ticked, then input the values of 2mm width and 2mm height, set the colour to black. Click OK. This will give us a 1mm black border all around the image, in black.
Step 2: Create a second border by going to Image>Canvas Size. Enter the values 10mm width and 10mm height, set colour to white. Click OK. This will give us a 5mm border all around the image, in white.
Step 3: Double click on the blue area of the “background” layer in the layers palette.
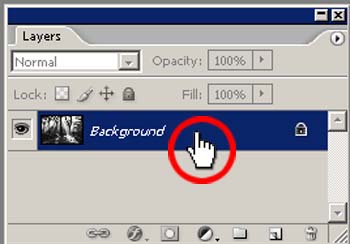
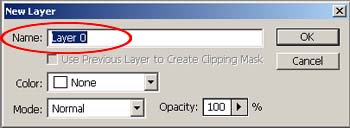
The new layer palette will appear. Accept the “layer 0” name by clicking OK. This has renamed the background layer into “layer 0”. It is now an independent layer and can be moved anywhere in the layer stack, (all will come clear later).
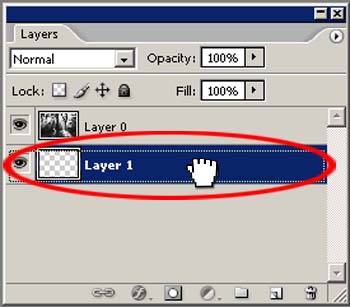
Step 4: Create a new layer by clicking on the “create a new layer” icon at the base of the layers palette.
This creates a new layer and makes it active. A layer is active when shown in blue.

Step 5: With the new layer (layer 1) active go to Image>Canvas Size, input the values 2mm width and 2mm height. Tick the relative box. Also you will notice the “canvas extension” box is greyed out and we are unable to select a colour. This is not a problem, just click OK to select the new canvas size.
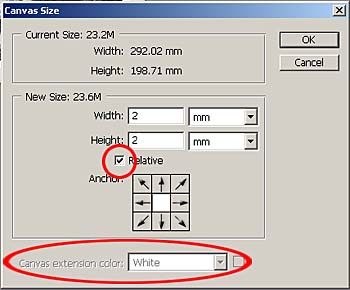
You will notice now that the image size is larger, but we have a transparent (chequered layer) showing around the image.
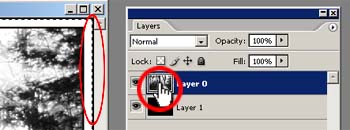
Step 6: With “layer 1” active (shown in blue), move your cursor over the blue area of “layer 1” in the layers palette. The cursor will change into a “hand”. Click and hold down the left mouse button and drag “layer 1” down, under “layer 0”. This has changed the layer order, “layer 0” is now on top of “layer 1”. If we had not renamed the “background” layer earlier in this workshop we would not have been able to do this. The background layer would have been stuck at the base of the layer stack.
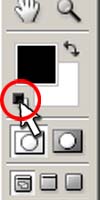
Step 7: Click on the default foreground and background colours icon. This will set the foreground colour to black, and the background colour to white.
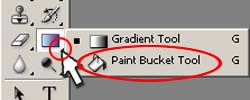
Step 8: Next click on the paint bucket tool located in the middle of the tool palette. If you are unable to see the paint bucket tool, it will be hidden under the gradient tool. To select the hidden paint bucket, click and hold down your left hand mouse button on the small black triangle in the bottom right hand corner of the gradient tool. This will show the flyout menu. Click on the paint bucket tool to select it.
Step 9: Now with “layer 1” active (shown in blue), click the paint bucket cursor in the image to fill the layer with black. Notice now you have a thin black border line around the very outer edge of the image.
Step 10: Click on “layer 0” in the layers palette to make it active. It should now be shown in blue.
Step 11: Place your cursor over the thumbnail of the image in “layer 0” in the layers palette. Now by holding down the “Ctrl” key on the keyboard and at the same time clicking your mouse button over the “layer 0” thumbnail image, you will select everything on that layer. This will be shown by the marching ants.
Step 12: With the marching ants showing around your image, click on “layer 1” in the layers palette, to make it active. With layer one active hit the “delete” key on the keyboard.
This has deleted most of the colour on “layer 1”, just leaving us with the thin black border line around the outer edge.
Go to Select>Deselect, or “Ctrl” and “D” on the keyboard, to deselect the selection.
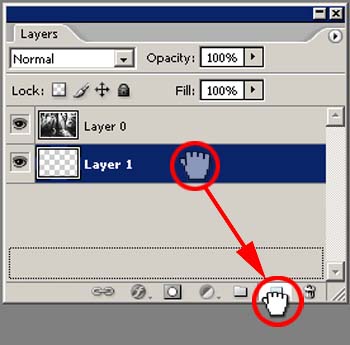
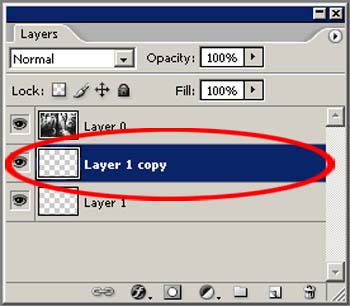
Step13: Next we are going to duplicate “layer 1”. The quickest way to do this, is to click on “layer 1” to make it active, then click in the blue area and by holding down the left mouse button, drag the layer down and over the “create new layer” icon at the base of the layers palette. When you have the hand over the “create new layer” icon, let go of the mouse button and this will create a new copy of
“layer 1”, called “layer 1 copy”.
|  |
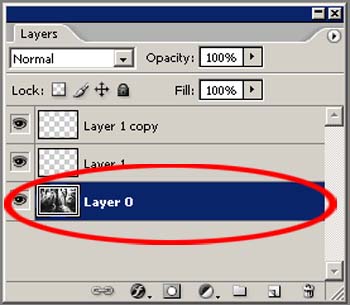
Step 14: Click on “layer 0” to make it active. Click in the blue area, and while holding down the mouse button, drag “layer 0” under “layer 1”. This changes the layer order. You should now see this.
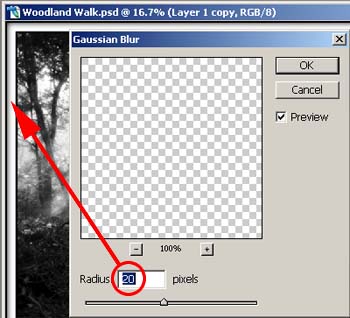
Step 15: Click on “layer 1 copy” to select it. Go to Filter>Blur>Gaussian Blur. While adjusting the blur amount watch the outside of your image to get your desired blur effect. I used a value of 20. This gave me enough drop shadow without it bleeding into the white area around the image. Click OK to apply
Step 15: Finally we need to flatten the image. Click on the small black arrow in the top right hand corner of the layers palette. In the flyout menu, click on, “Flatten Image”.
This is the final effect. (Click on image to see larger view)
This was a bit of a marathon, just to create a drop shadow border, but it has also helped us understand a little on how the layers palette works.
To download a printable version of this workshop, click on the link below