
How To Get a Print Profile
This workshop will show you how to get a Print Profile for your selected Printer, Paper and Ink combination.
A print profile (sometimes referred to as an “ICC Profile”) is a data file that characterises your printer, paper and ink combination. By printing a test chart we then process it through our “Eye-One” profiling system, which will generate a custom ICC Profile to give you the best possible printing results for that combination. If you change any one thing in that combination, you must have a new profile created.
Please note: It would be beneficial to read the complete workshop before you attempt to follow the procedure. If you would like a print out to read, please follow the links at the end of this workshop.
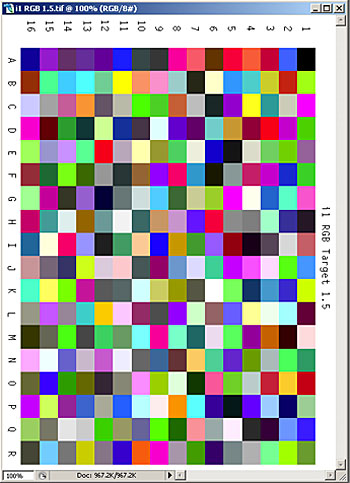
Step: 1. Before you start this workshop you will need to download the “i1 RGB 1.5.tif” file. To download this file click on the “i1 RGB 1.5.tif” target file image below. You will then get a message saying “Do you want to open or save this file”. Click “Save”. You will then be asked where you would like to save this file. Save the file in a convenient location on your computer where you will be able to find it at a later stage in this workshop. Click “Save”. The download process will start. The file you are downloading is 975kb in size, so the download times will vary depending on your internet connection speed. When the file has downloaded you will get a message saying “Download Complete”, click “Close”. If at any point when you are saving the file a “Tiff Options” box appears, accept the default settings of, Image Compression – None, Pixel Order – Interleaved (RGBRGB), Byte Order – IBM PC. Click OK to continue. The file is now downloaded onto your computer and ready to use. We will use this file later in the workshop.
Note: The “i1 RGB 1.5.tif” target file is A4 in size. If the paper you wish to profile is A3 or above you will need to cut the paper down to A4 when it comes to the printing stage in this workshop.
Step: 2. The next important thing to do is carry out a nozzle check on your printer. Please refer to your printer manual to carry out this task. The printer must produce a perfect nozzle check print before you continue.
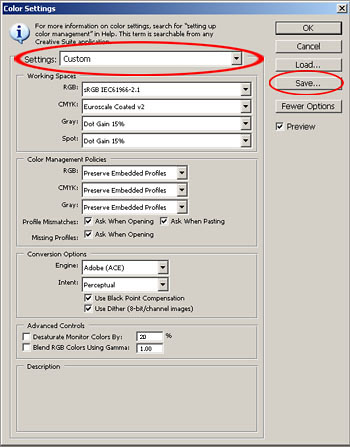
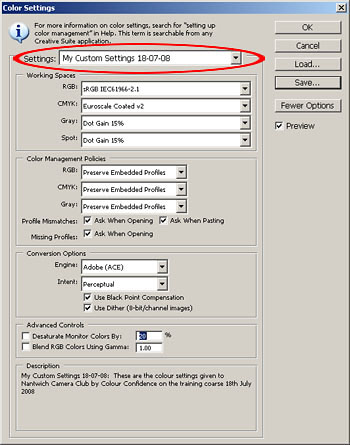
Step: 3. We are now going to set our Colour Settings in Photoshop. To do this, go to Edit>Colour Settings. In the Colour Settings dialog box select “Custom” from the Settings drop down menu. In the Working Space set the RGB by selecting “sRGB ICE61966-2.1” from the drop down menu. (In past lectures and instructions we have been instructed to use “Adobe RGB 1998” as a colour setting, but this is based on industry standards and not for home users. Monitors are not capable of displaying
Adobe RGB and ink-jet printers cannot reproduce Adobe RGB, so it is pointless using anything other than sRGB!). Set the CMYK to “Euroscale Coated v2” and set both the Gray and Spot to
“Dot Gain 15%”. In Colour Management Policies set the RGB, CMYK and Grays to “Preserve Embedded Profiles” and tick the 3 options boxes. In the Conversion Options set the Engine to “Adobe (ACE)” and set the Intent to “Perceptual”and tick the 2 options boxes. The Advance controls are set to 20% and 1.00 but un-ticked. Your Colour Settings should now match the Colour Settings dialog box shown below. If your dialog box doesn’t show all the options, click on the “More Options” button on the right hand side.
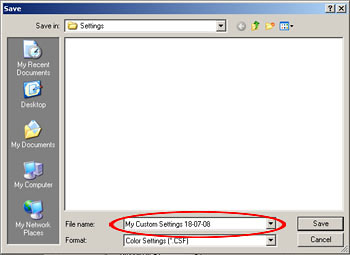
When you have matched all the settings in the dialog box, click “Save”. In the Save dialog box we need to give our new custom settings a file name, I used “My Custom Settings 18-07-08”. I included the date in my file name so I know when the settings were created. Click Save.
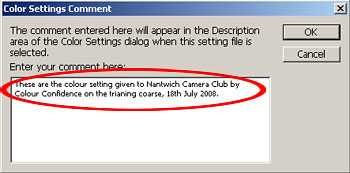
The next dialog box to appear is the “Colour Settings Comments”. Here you can make comments about your custom colour settings. I made a quick comment on where these settings had come from. Make your own comment or leave it blank. Click OK.
Your Colour Settings dialog box should now look like this (see below). Settings will show your new custom settings name, and any comments you made will appear at the bottom. Click OK to save and apply these new custom settings.
Step: 4. Go to File>Open. Locate and open the “i1 RGB 1.5.tif” file you downloaded at the start of this workshop. When the file opens in Photoshop you will be presented with a Missing Profile message saying “The document ‘i1 RGB 1.5.tif ‘ does not have an embedded RGB profile” what would you like to do? At this point you need to select “Leave as is (don’t colour manage)”
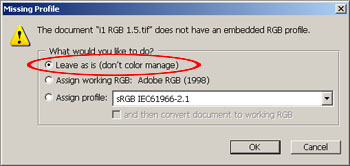
When this file is open in Photoshop, do not make any attempts to change this file in any way.
Step: 5. Go to File>Print with Preview. First make sure “Scale to Media” is un-ticked and the scale reads 100%. Under the image on the left hand side, select “Colour Management” from the drop down menu. In the “Print” section, select “Document (Profile Untagged RGB)”. In the “Options” section, select “No Colour Management” from the Colour Handling drop down menu. All the other boxes in this section will then be greyed out.

Double check these settings. It is very important that no mistakes are made in our “Print with Preview” box. Any mistakes made at this point will mean that you will not get a true colour print profile.
When you have checked all the settings, Click Print.
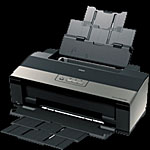
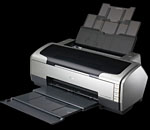
Click on your preferred printer to continue with this workshop. If your printer is not listed, please continue below.


If your printer is not shown above you will now need to refer to your printer manual to find these appropriate settings.
In your print properties dialog box, first select A4 paper size. Then select the type of paper you are using. For this workshop let us say that we are profiling “Fuji Premium Gloss Photo Paper”. Select, Photo Quality Glossy Film or Premium Glossy Photo Paper. These paper selection will give us the best photo realistic results. Next we need to turn off any colour management or colour optimising settings. If you are using a Hewlett Packard printer you will need to select “Native Without Black Replacement” and Epson printers you need to find and select “No Colour Adjustment”, this settings can be found in the Advance sections of your print properties dialog box.
When you have set your printer options you need to save the settings, because every time you use this paper type you must use the exact same settings as you used to create the profile. If using an Epson printer click “save settings” in the Advance section of the print properties dialog box. In the “save settings” dialog box type “Fuji Prem Gloss” or something similar to suit your paper type, as you will need to apply these settings to all subsequent prints using this paper with the generated profile.
Click print. When the target file has printed allow the print to dry for 24 hrs.
Next, down load and print the “Profile Request Form” (link below). Fill out the form, post or hand (Do Not Fold) the “Target” print and the “Profile Request Form” to your colour management club member. If you are not a Nantwich Camera Club member you will need to contact a Nantwich Camera Club committee member (details on website) to find out how you can have your paper profile created.
When your profile has been processed you will receive an email containing your new generated “ICC Profile”. After receiving the profile you will then need to follow the workshop on, “Installing and Using Printer Profiles”.
Faulty Print Patches.
Before you submit your printed target patch for profiling, please view the printout in close detail. Below is an enlarged view of a section from a printed target patch. You will see that the printed patches are bleeding into each other.
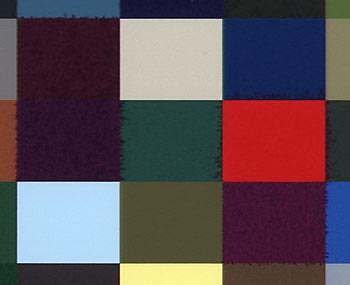
This is caused by ink and paper incompatibility. This section was taken from an old type Fuji High Gloss paper (Note: this is not a Fuji fault) and printed on an Epson R2400. The Epson R2400 uses pigment inks and the Fuji paper was possibly manufactured before pigment inks were introduced into home printers, so they are not compatible. Please bear this in mind when purchasing papers, as there are still papers on the market that are not compatible with the latest printers.
If your printout has bleeding between colour patches, there is no point in having a profile created as you will never achieve an acceptable print from this ink/paper combination.
To download a printable version of this workshop, click on the link below
Click on the link below to download a “Profile Request Form”